Garden with Insight v1.0 Help: How to change a tool's pictures
To change a tool's actions, first choose Tools from the Edit
menu on the garden window to open the tool editor.

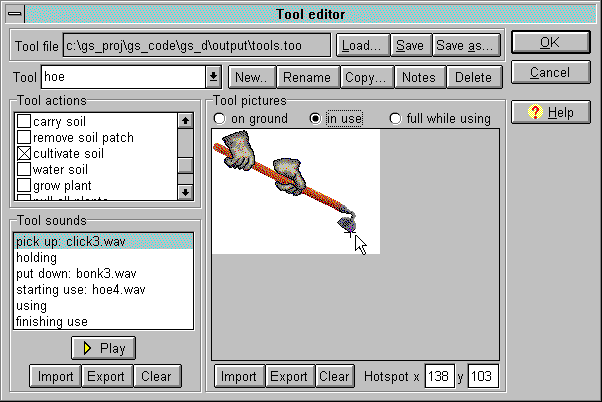
The tool editor window
In the tool editor, select the tool you want to change from the tool drop-down list next to the word
Tool. Now look at the Tool pictures panel on the right side of the tool editor.
For each tool, you need one picture for when the tool is lying around (on the ground) and one for
when you are holding it (in use). For tools that carry mulch or
soil, you need one more picture for when the tool is full of soil or mulch (full while using).
Choose one of these tool picture states from the three radio
buttons at the top of the pictures panel. The current picture for that tool state will appear below the
radio buttons. To change the picture, click the Import button under the picture, then choose a
bitmap (.bmp) file and click OK. The new picture will show in the pictures panel.
Now that you have set a new picture for the tool, you must set the hotspot for the picture. Click on the picture where you want the hotspot to
be. A small crosshair will appear on the bitmap at that spot, and the x,y coordinates of the hotspot will
appear under the picture (where it says Hotspot). You can edit the x,y coordinates of the hotspot
to get a more precise value. Also, to change the hotspot one pixel at a time, click in the X or Y edit boxes
after the word Hotspot, then hold down the Control key and type one of the
arrows on your keyboard. The hotspot will move one pixel in the direction of the arrow.
Click OK to save your changes, or click Cancel to abandon them.
| 
